Grant Brellium read-only access to group memberships in Microsoft Entra ID so Brellium can sync groups that are not assigned to the SCIM application
This guide adds two read-only Microsoft Graph permissions to your existing Brellium SSO application and grants admin consent for your organization. It takes about 5 minutes.
SCIM provisioning only pushes groups that are directly assigned to the Brellium SCIM enterprise application. Microsoft Entra ID does not send any other groups, even if provisioned users are members of them.
Your setup
Graph permissions
Brellium only needs the groups that are assigned to the SCIM application
Not needed
Brellium also needs groups that are not assigned to the SCIM application (for example, location or department groups)
Required
With these permissions, Brellium reads group memberships from Microsoft Graph for the users that SCIM provisions. You do not have to assign every group to the SCIM application.
The screenshots come from a Brellium test tenant. Your application name, organization name, and IDs will be different.
The Global Administrator or Privileged Role Administrator role. You need one of these roles to grant admin consent for Microsoft Graph application permissions.
A Brellium account with the can edit org settings permission, with SSO and SCIM turned on for your organization (see Access the Brellium setup portal)
The client ID of your Brellium SSO application. In Brellium, go to Control Center > Settings. The Client ID under Single sign-on is the Application (client) ID of the app registration in Entra ID.
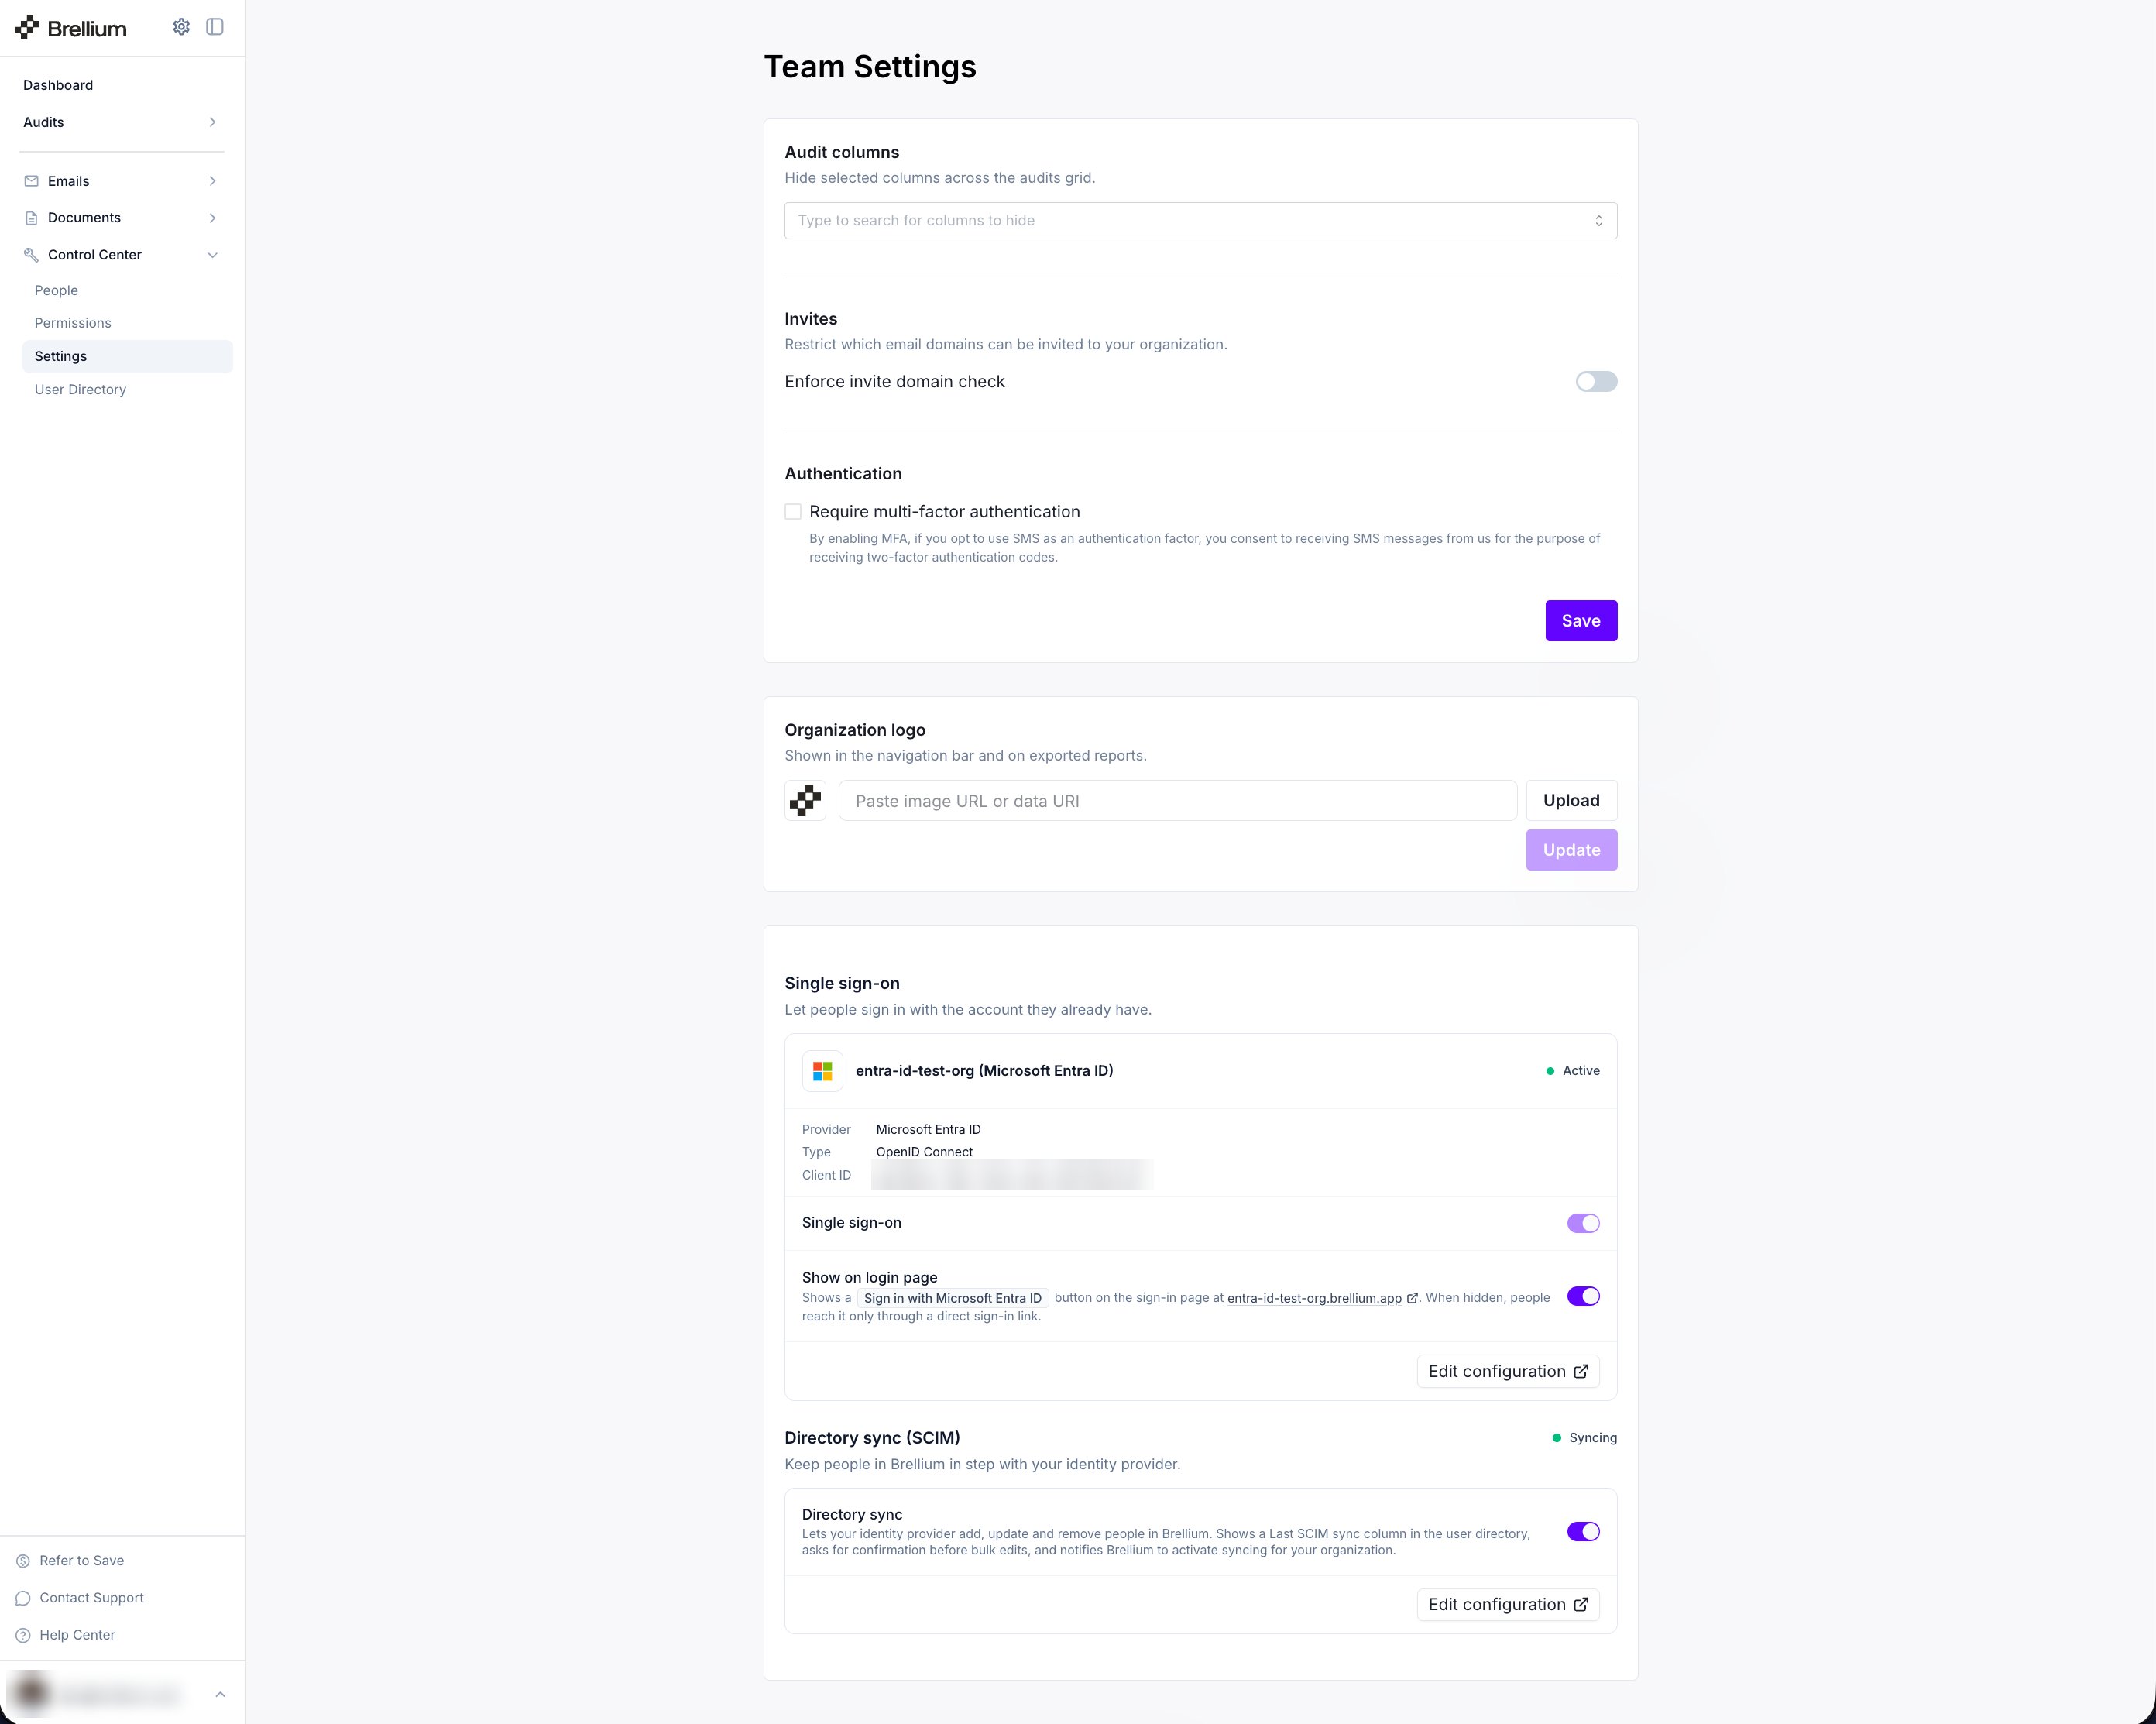
IT administrators can open the SSO and SCIM setup portal on their own. In Brellium, go to Control Center > Settings. The Single sign-on and Directory sync (SCIM) sections each have an Edit configuration button. Each button opens the setup portal for that connection in a new tab, so you can configure and change settings without a support ticket.
Brellium Control Center > Settings — the Single sign-on and Directory sync (SCIM) sections
Before you can use the setup portal, make sure that:
SSO and SCIM are turned on for your organization. If you do not see the Single sign-on and Directory sync (SCIM) sections on the settings page, contact your customer success manager to turn on the feature for your organization. You can open the SSO and SCIM configuration only after the feature is on.
You have the can edit org settings permission. Your Brellium account must have the can edit org settings permission under Settings. If you do not have it, ask a Brellium administrator in your organization to give it to you.
The can edit org settings permission under Settings
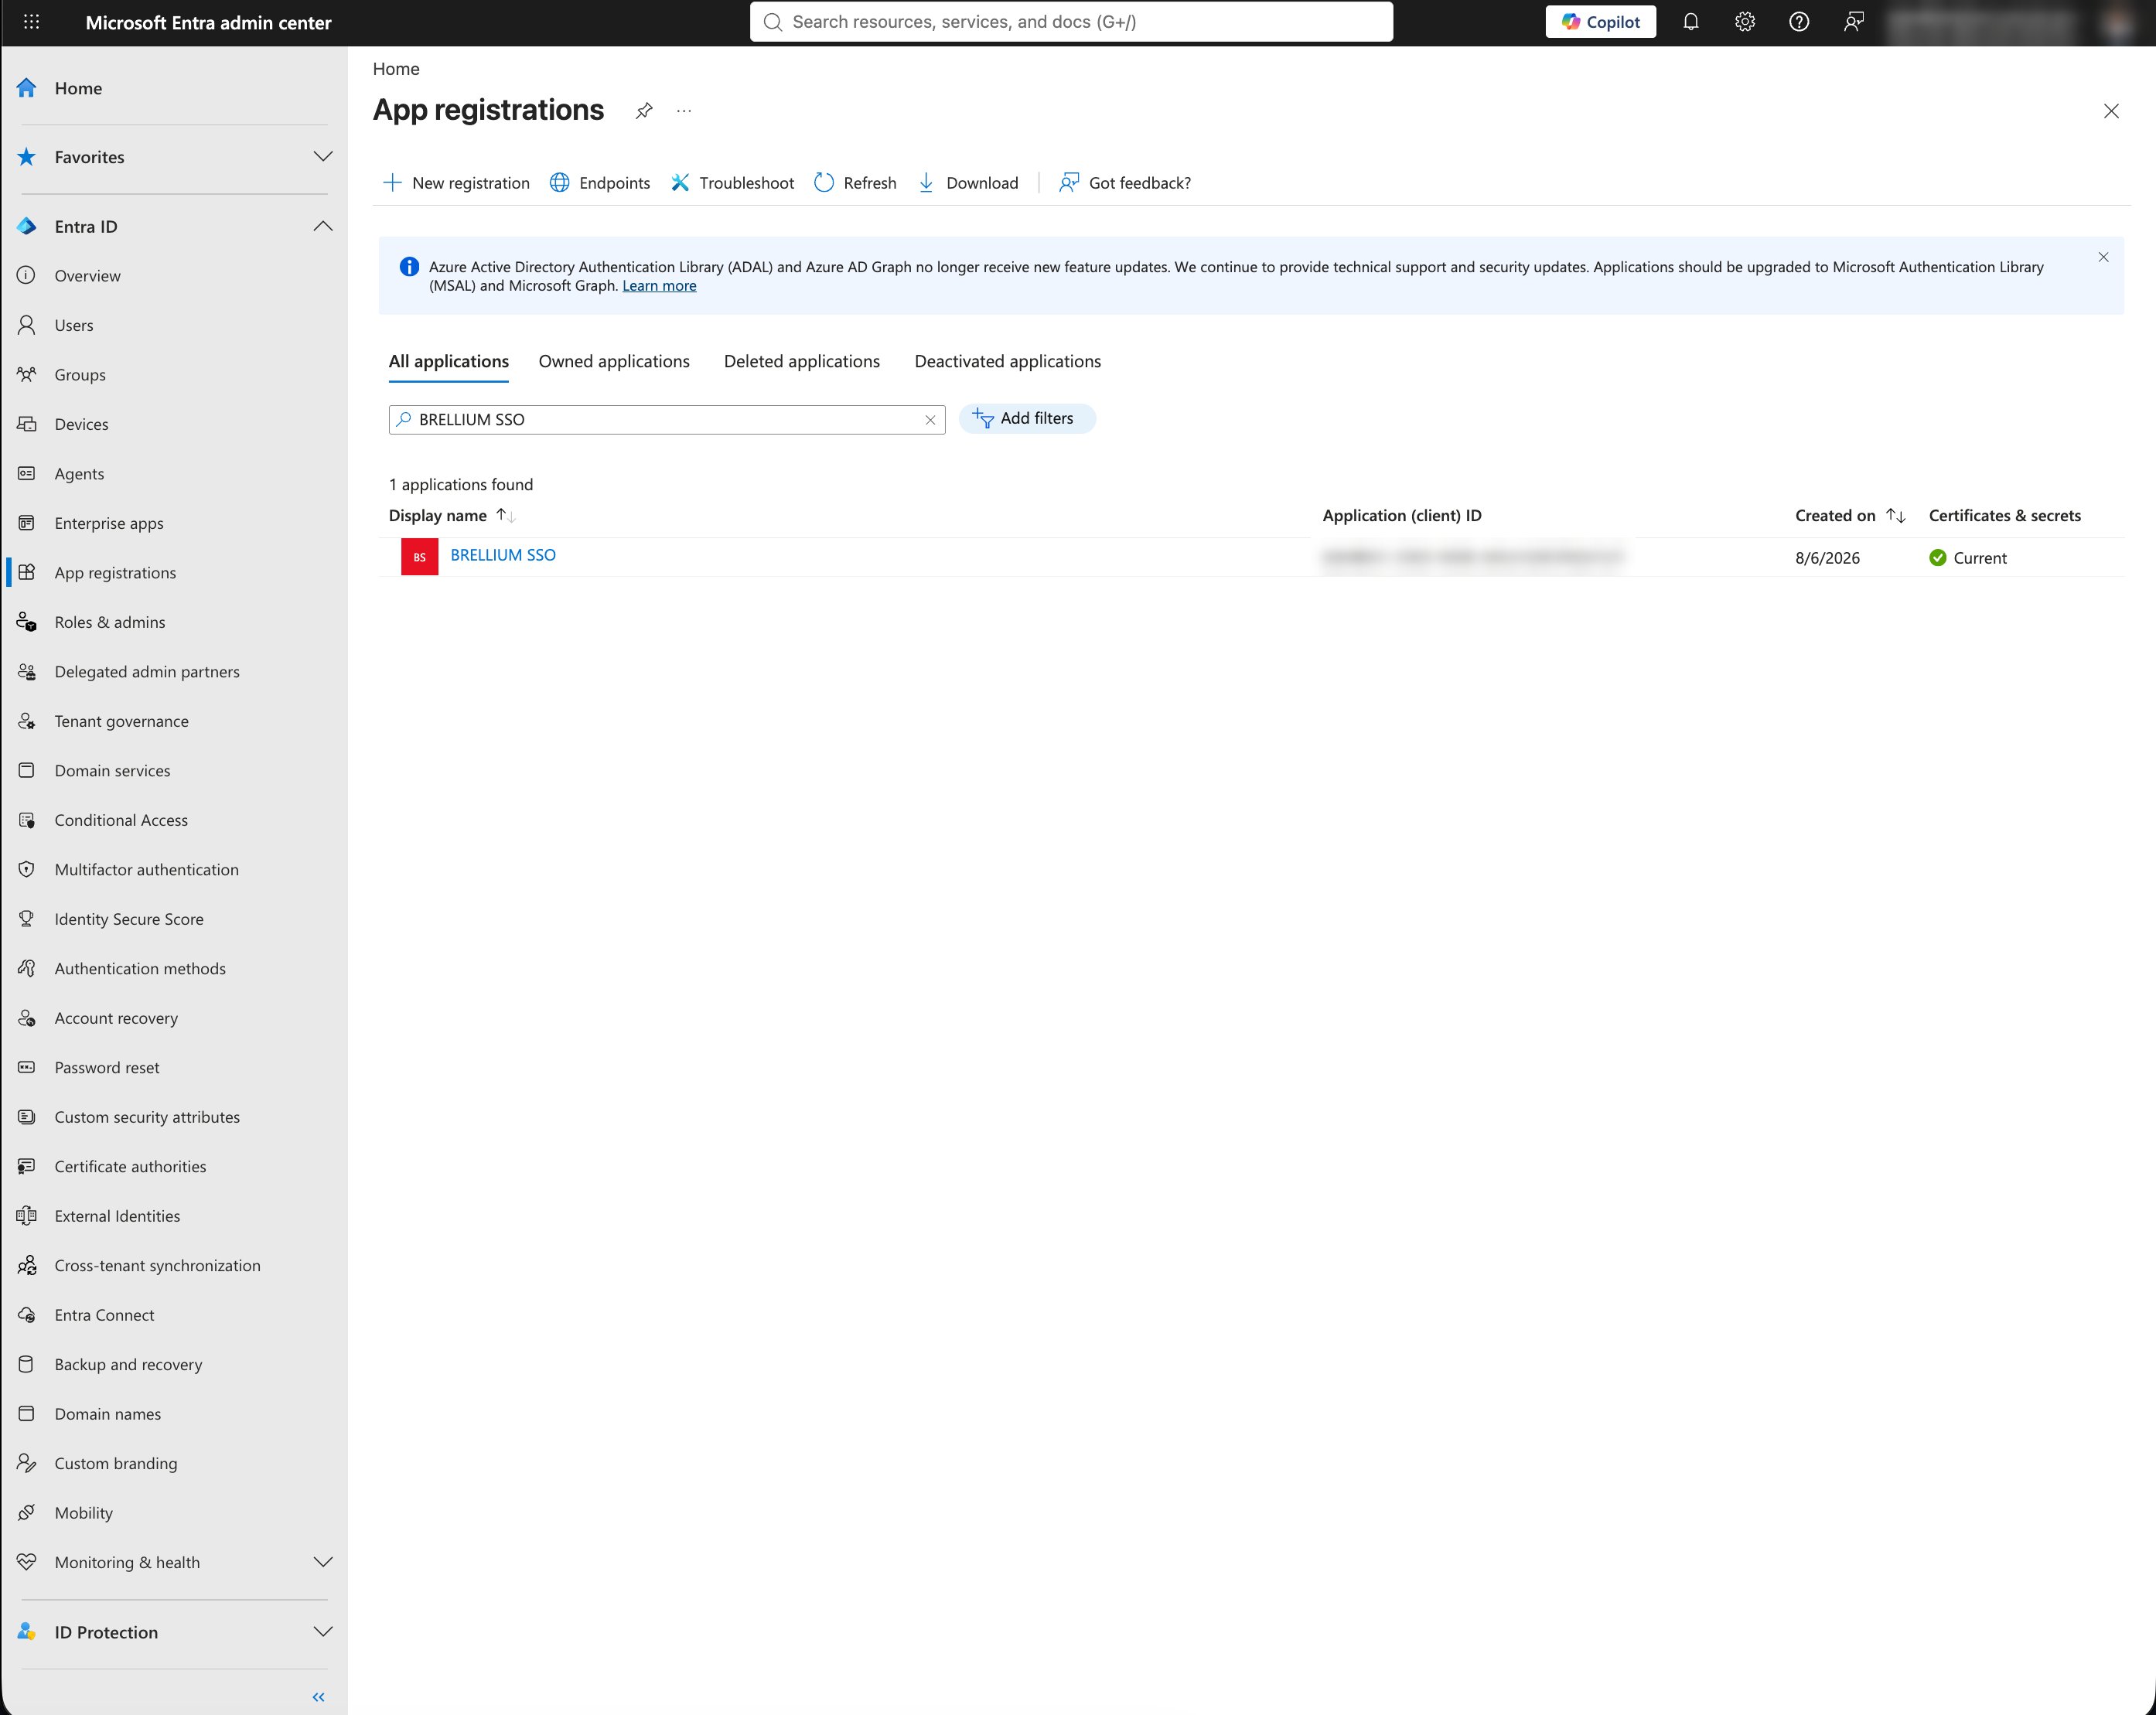
Go to Entra ID > App registrations and stay on the All applications tab.
Search for your Brellium SSO application by name (for example, BRELLIUM SSO) or by the client ID from Brellium, and select it.
App registrations — search for the Brellium SSO application
Use App registrations, not Enterprise apps. You add API permissions on the app registration.
2
Open API permissions
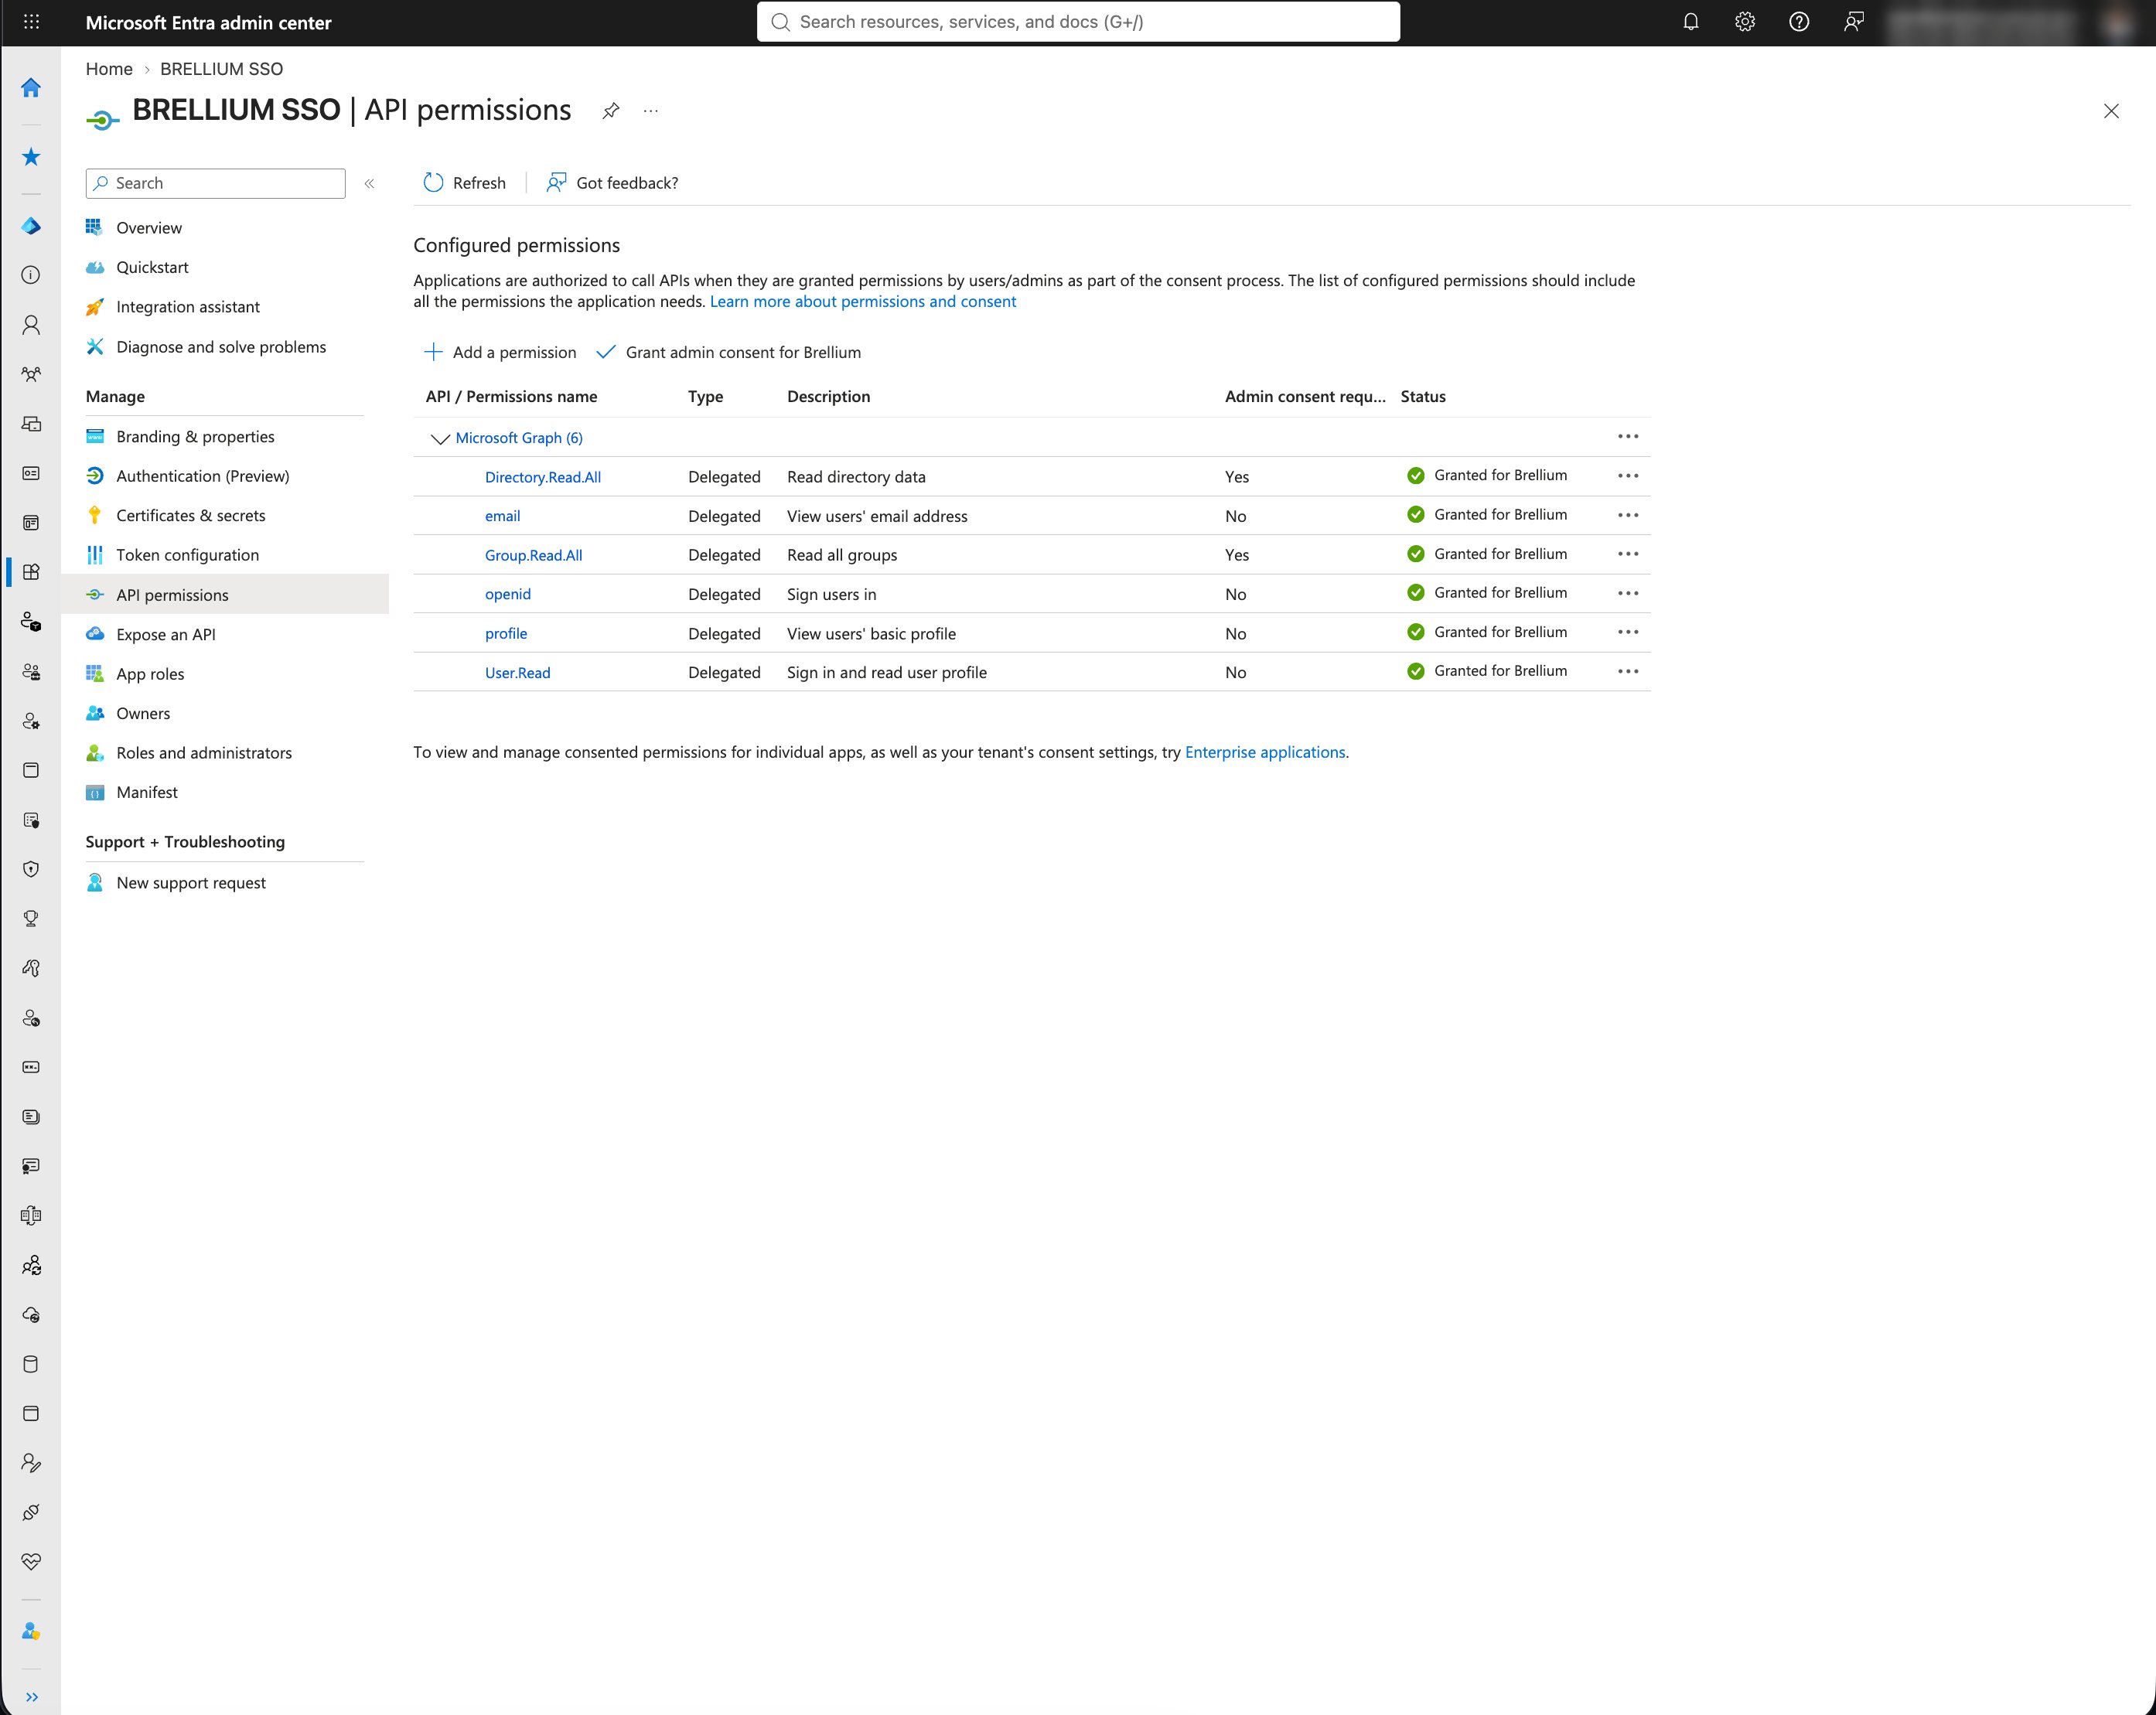
Go to Manage > API permissions.
Check the current list under Microsoft Graph. The SSO application already has delegated permissions such as Directory.Read.All, Group.Read.All, openid, and User.Read, all Granted for your organization. Do not change them. Sign-in uses them.
Click Add a permission.
API permissions — the existing delegated permissions on the SSO application
Your list can be slightly different from the screenshot. What matters are the two permissions you add in the next steps.
3
Choose Microsoft Graph
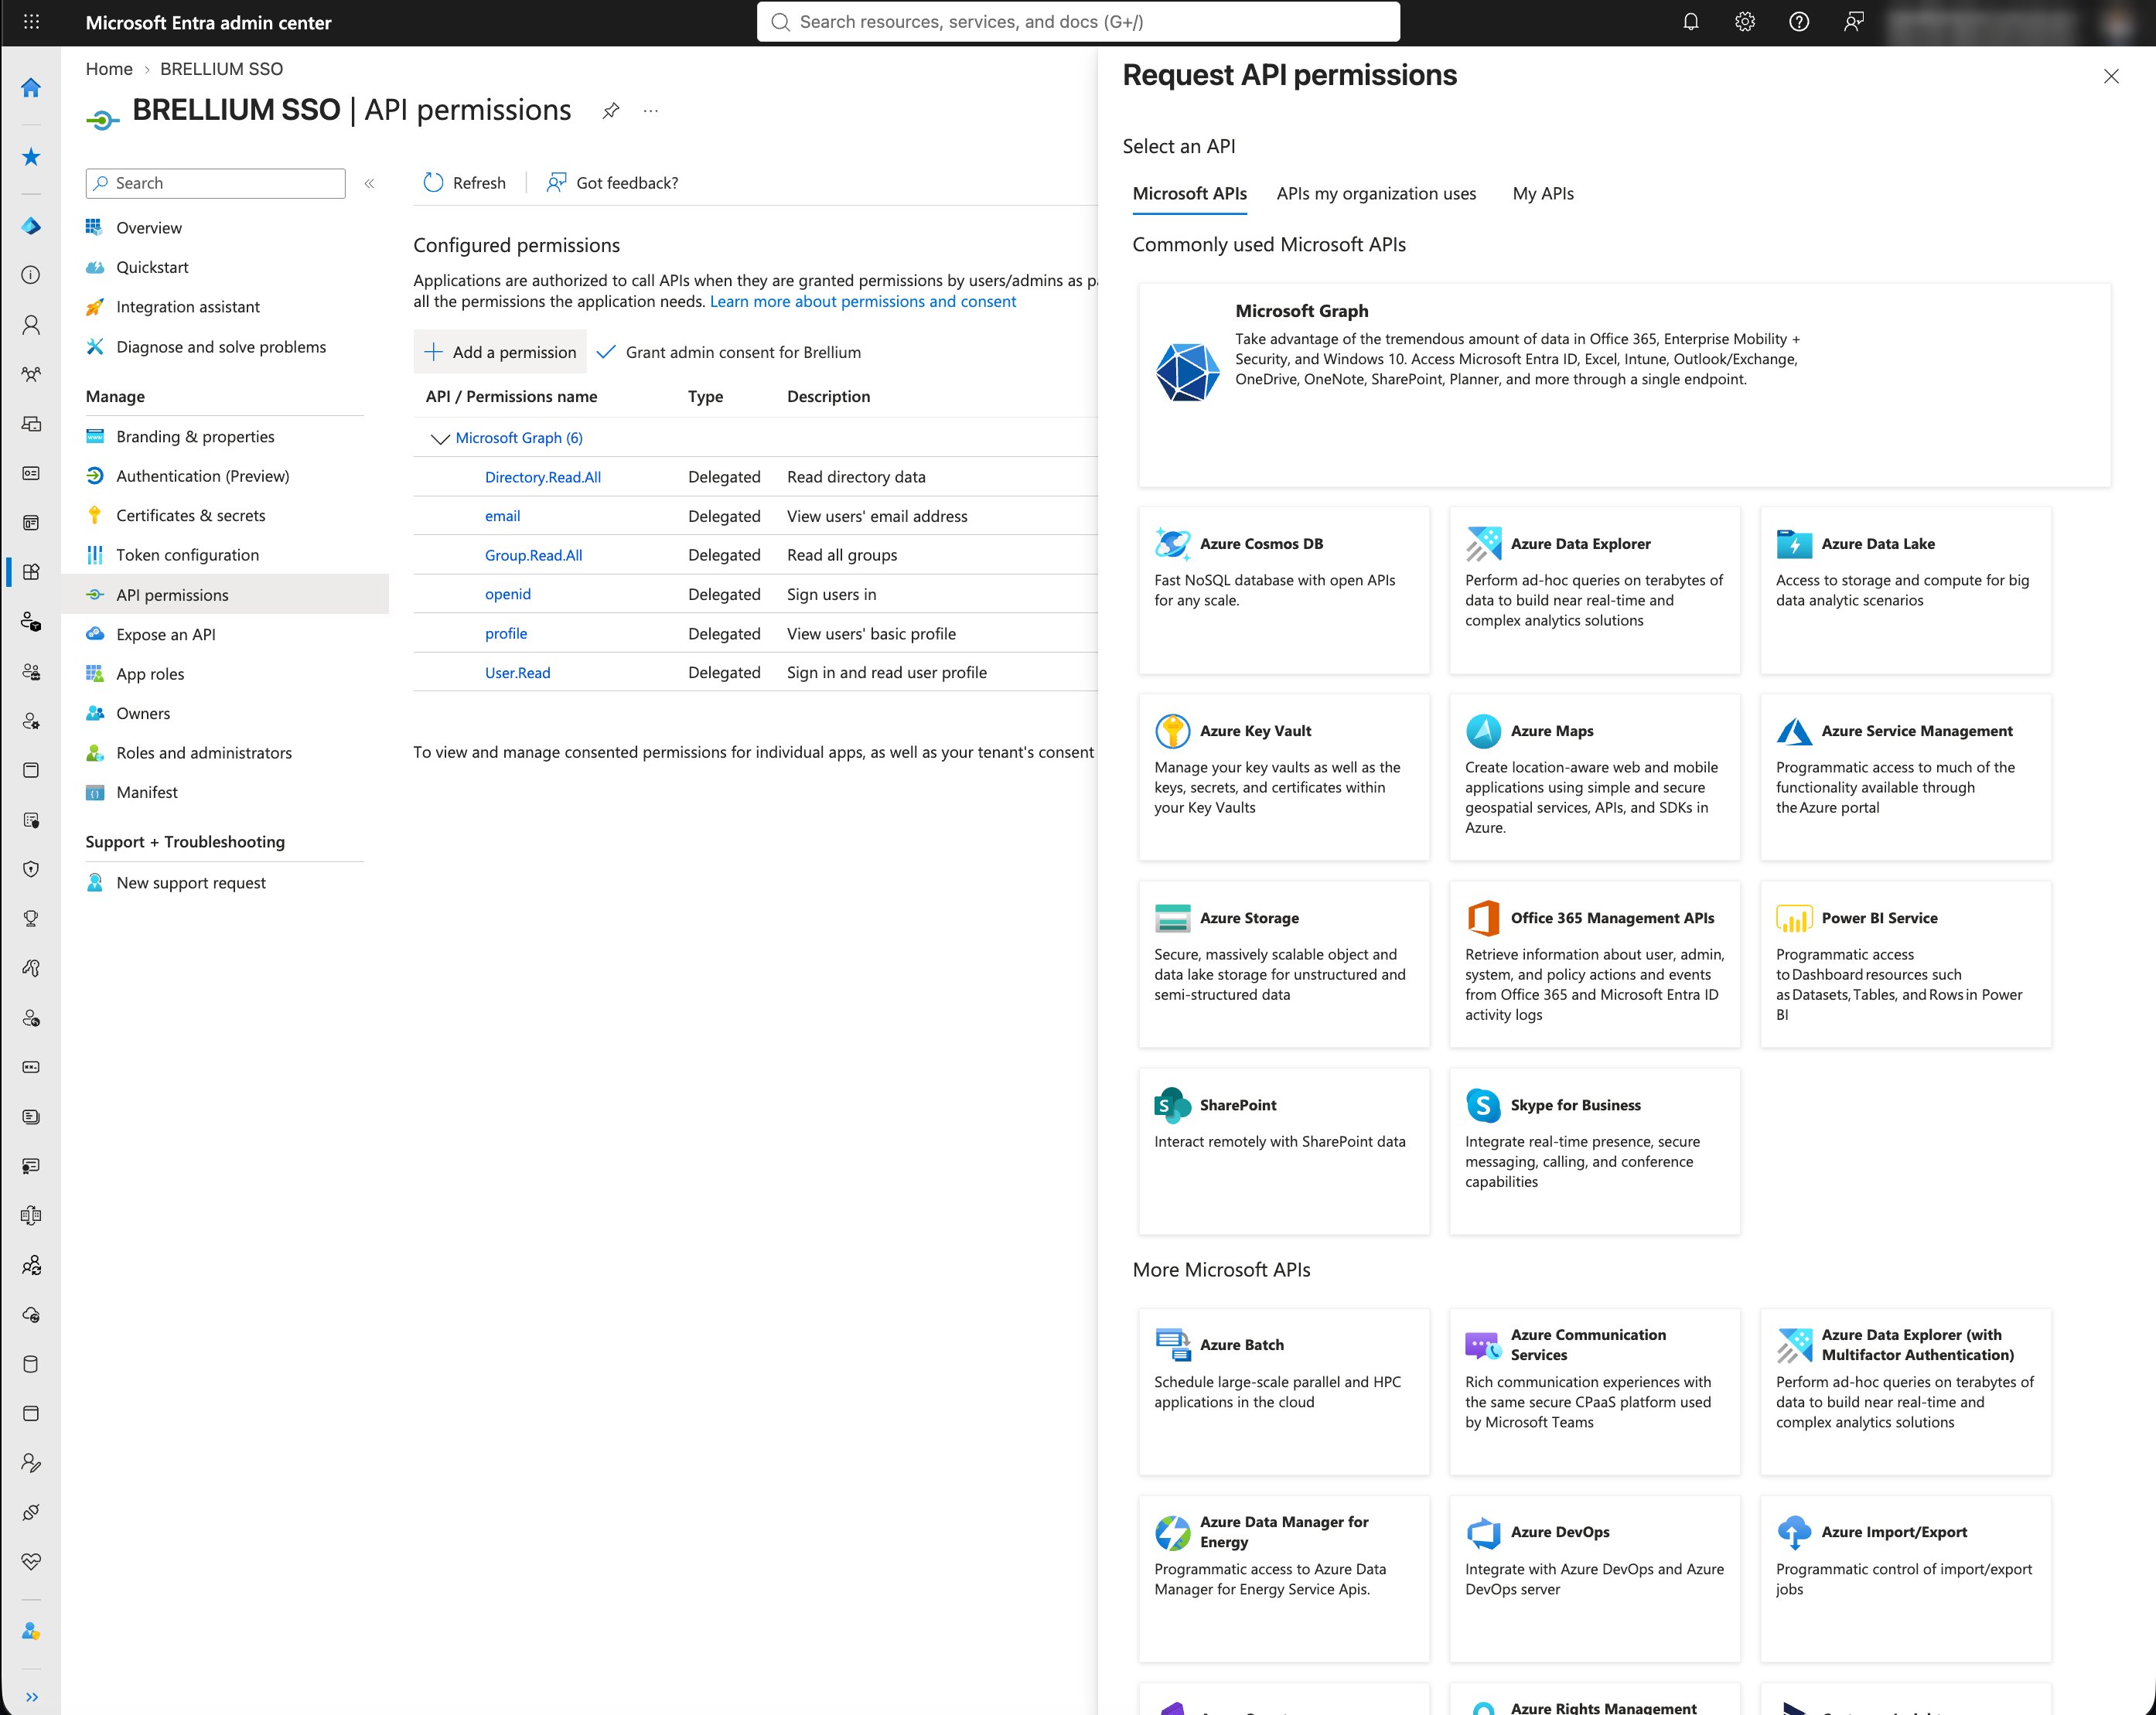
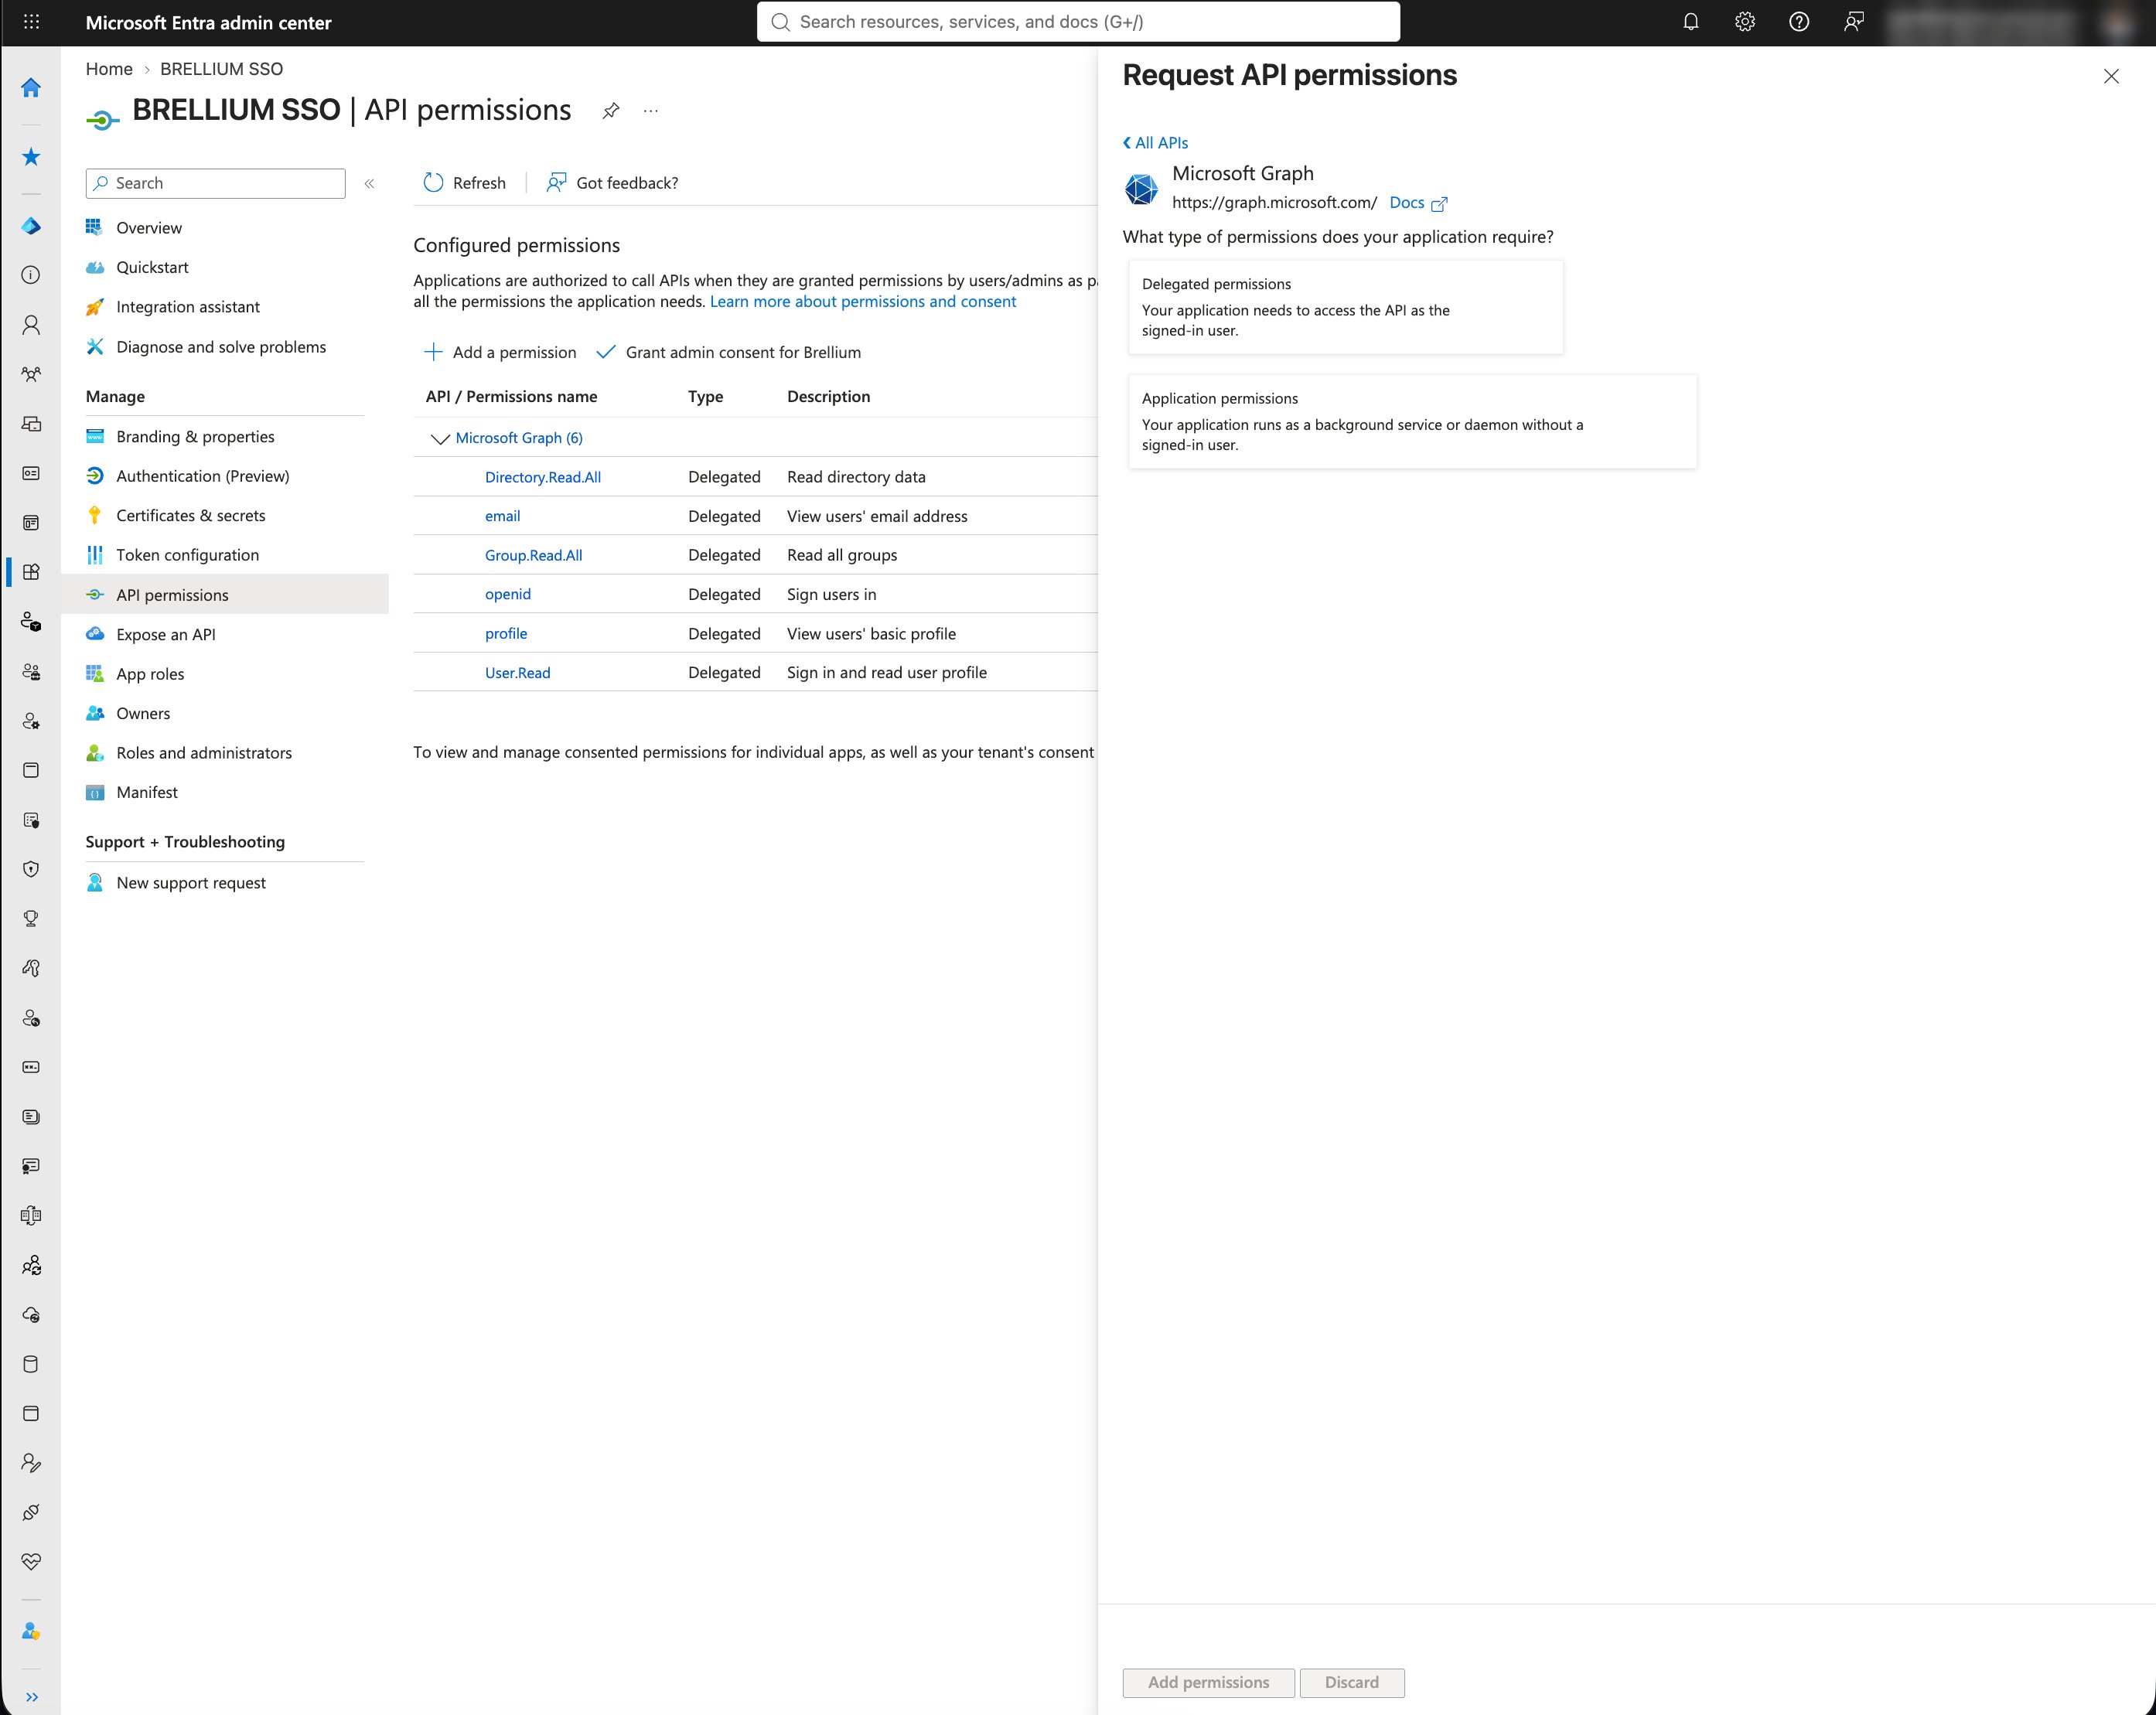
In the Request API permissions panel, stay on the Microsoft APIs tab and select Microsoft Graph.
Request API permissions — select Microsoft Graph
4
Choose application permissions
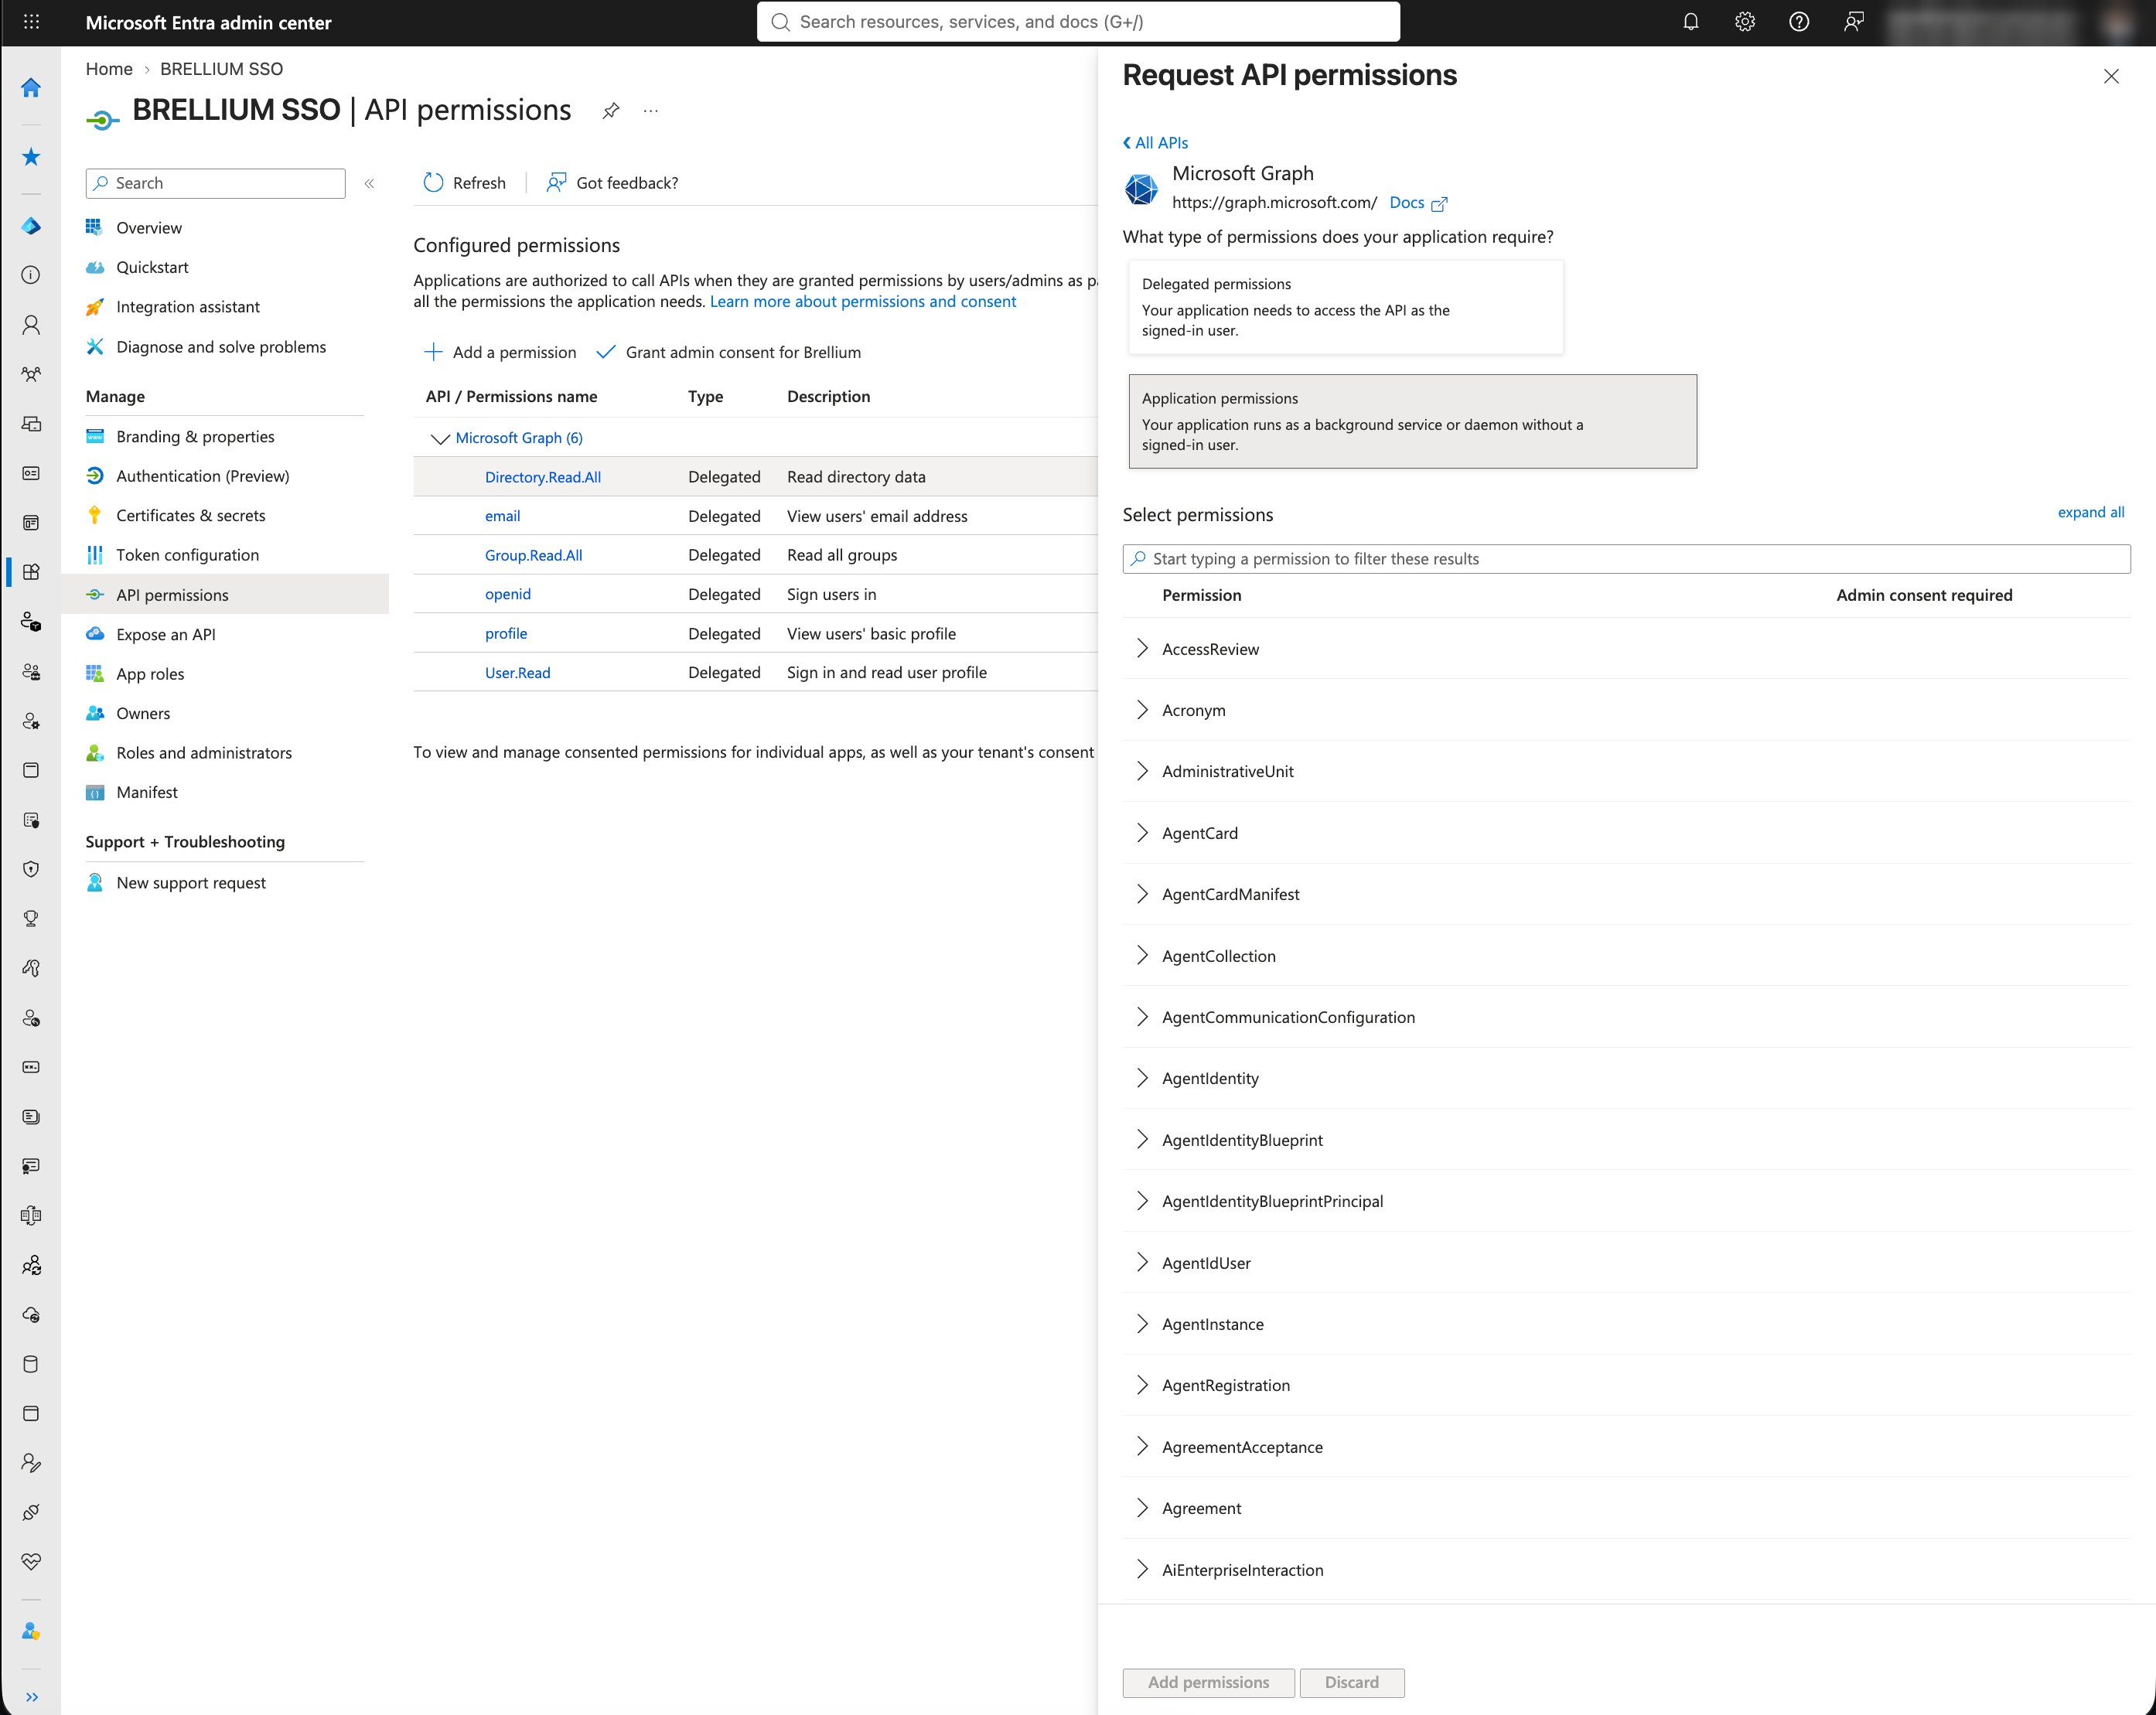
Select Application permissions (“Your application runs as a background service or daemon without a signed-in user”).
Select Application permissions
Do not select Delegated permissions. Brellium reads group memberships in the background, with no user signed in. Delegated permissions only work while a user is signed in, so they do not give Brellium access.
5
Select the two permissions
The Select permissions list opens with a filter box at the top. Add permissions stays disabled until you select at least one permission.
The Select permissions list
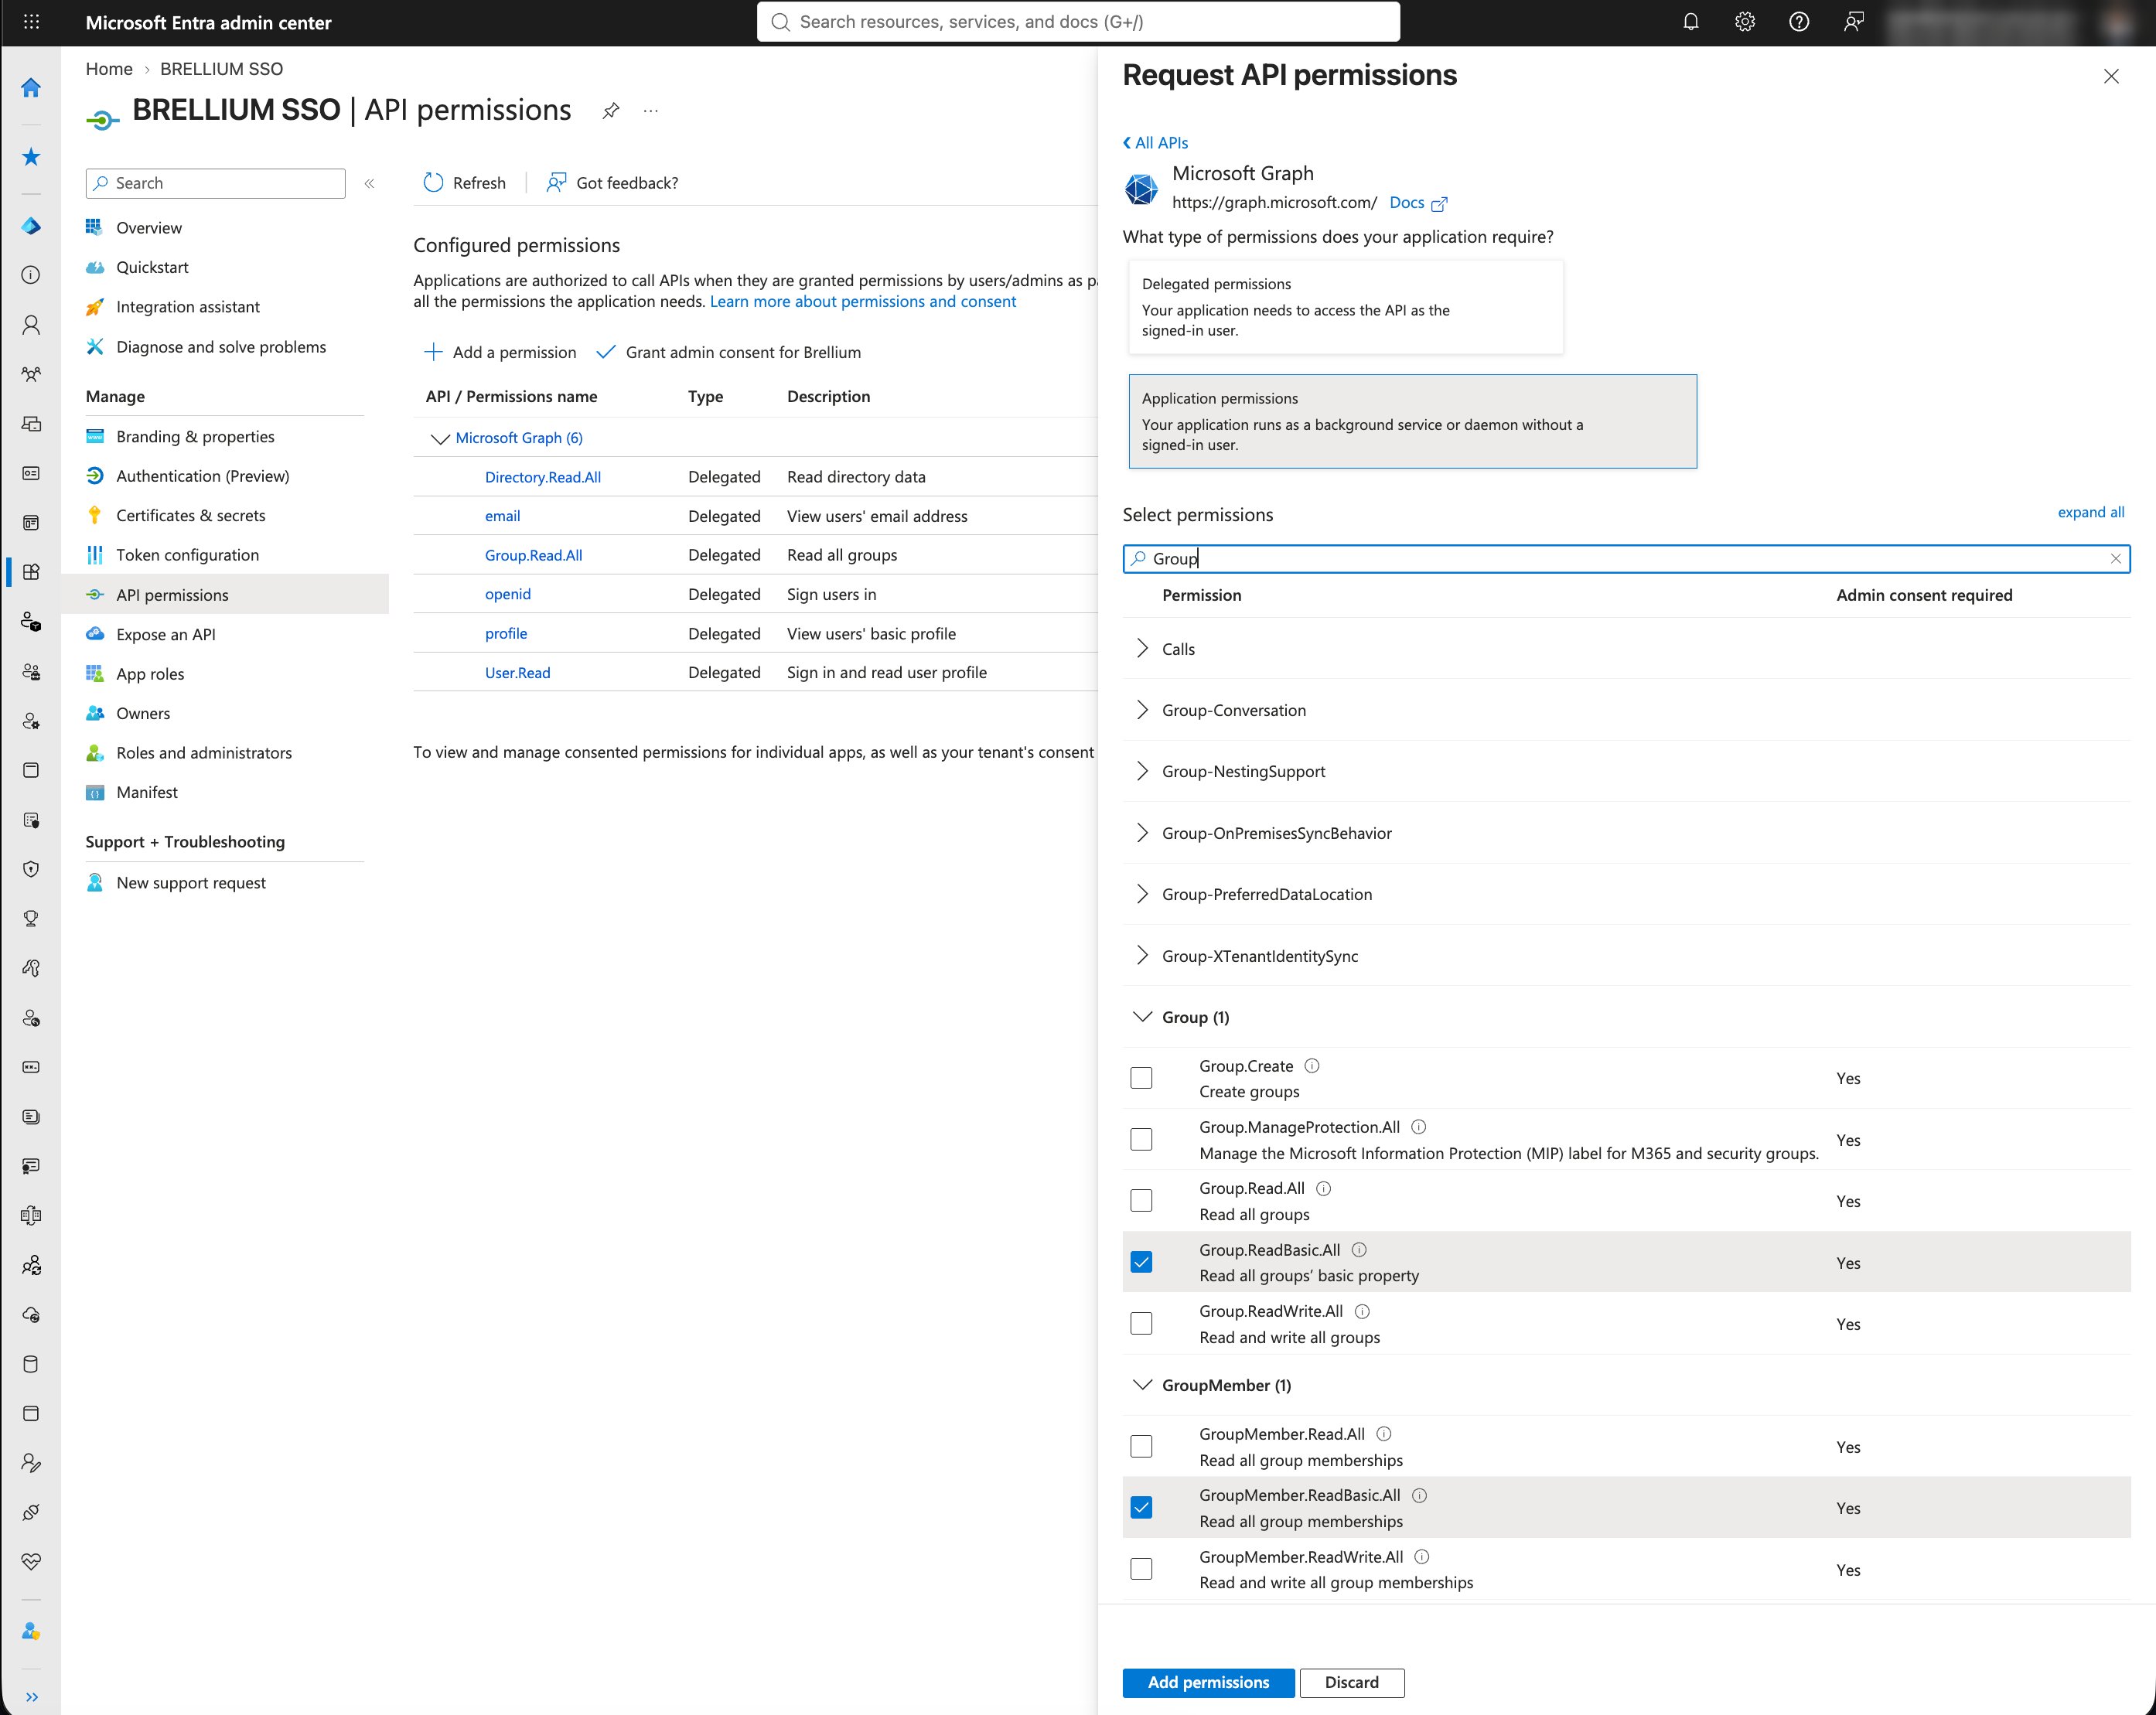
Type Group in the filter box.
Under Group, select Group.ReadBasic.All (“Read all groups’ basic property”).
Under GroupMember, select GroupMember.ReadBasic.All (“Read all group memberships”).
Click Add permissions.
Group.ReadBasic.All and GroupMember.ReadBasic.All selected
Select only these two permissions. Do not select Group.ReadWrite.All, GroupMember.ReadWrite.All, or other permissions in the list. Brellium does not need them.
6
Grant admin consent
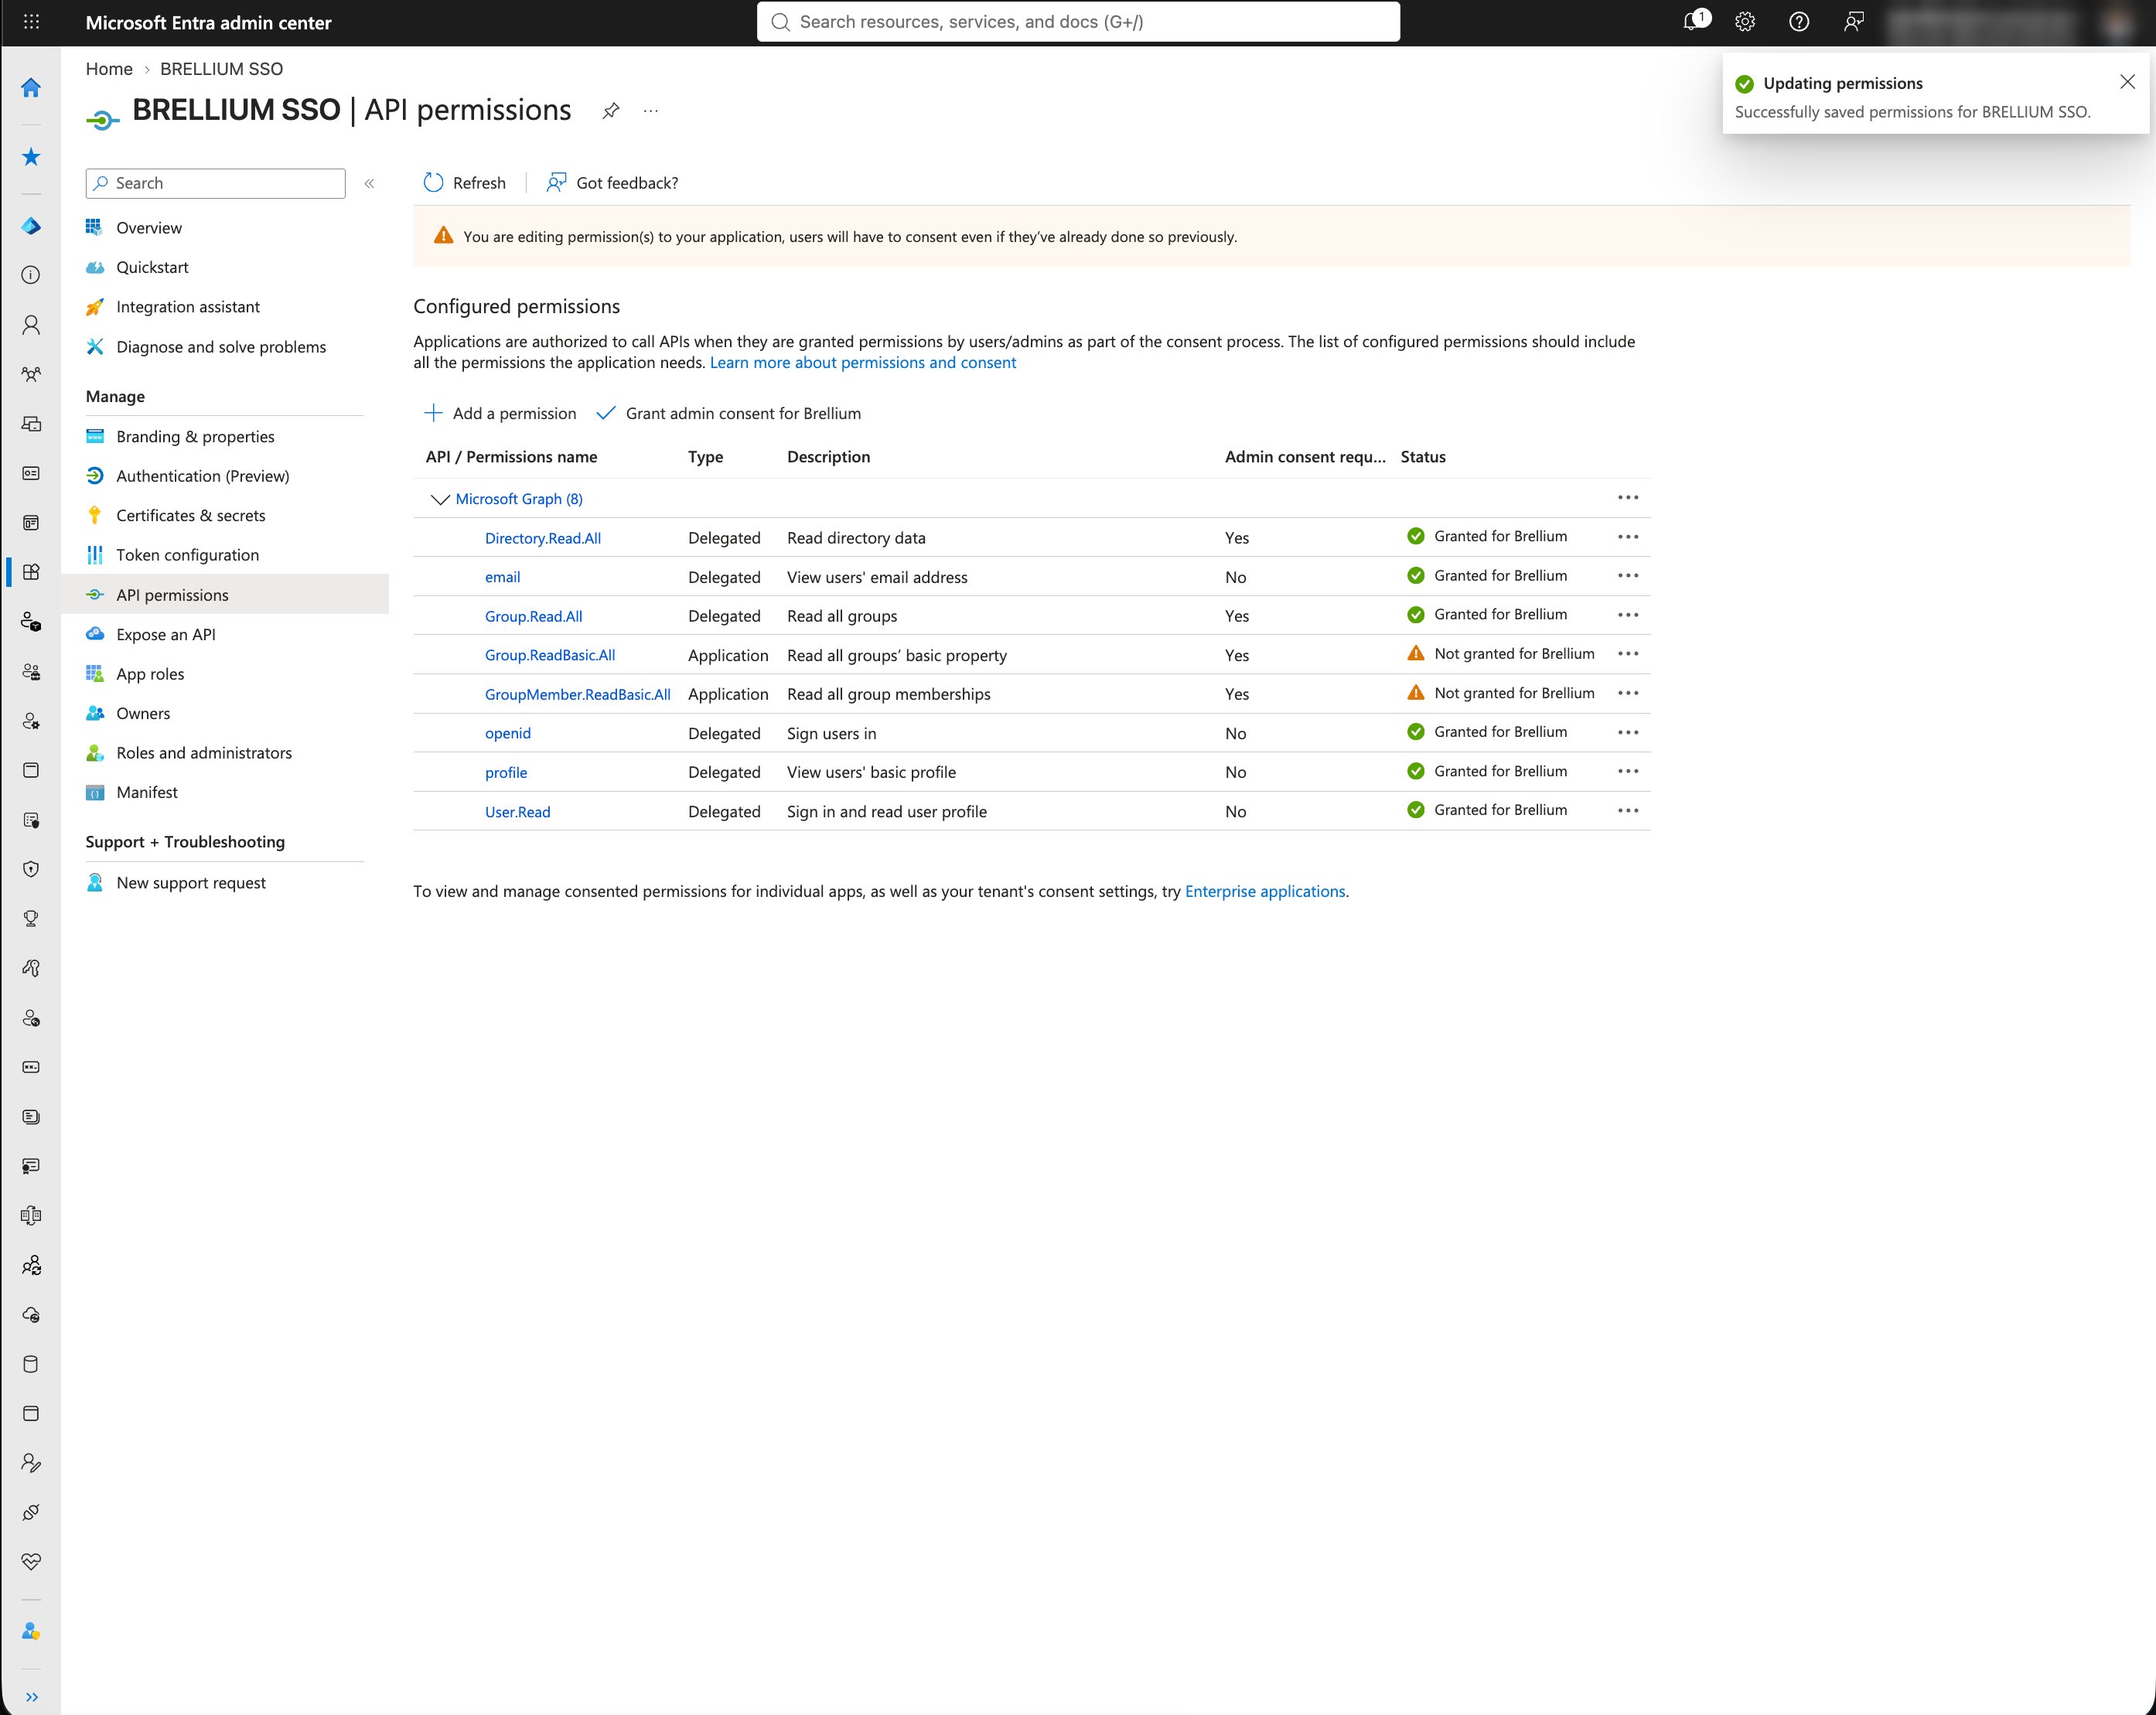
Wait for the message Successfully saved permissions at the top right.
Check that the list now shows Group.ReadBasic.All and GroupMember.ReadBasic.All with type Application and status Not granted for your organization.
Click Grant admin consent for your organization, then click Yes.
The new application permissions before admin consent
Grant consent in the same session. Until you do, the two new permissions stay Not granted and Brellium cannot read group memberships.
7
Verify that consent was granted
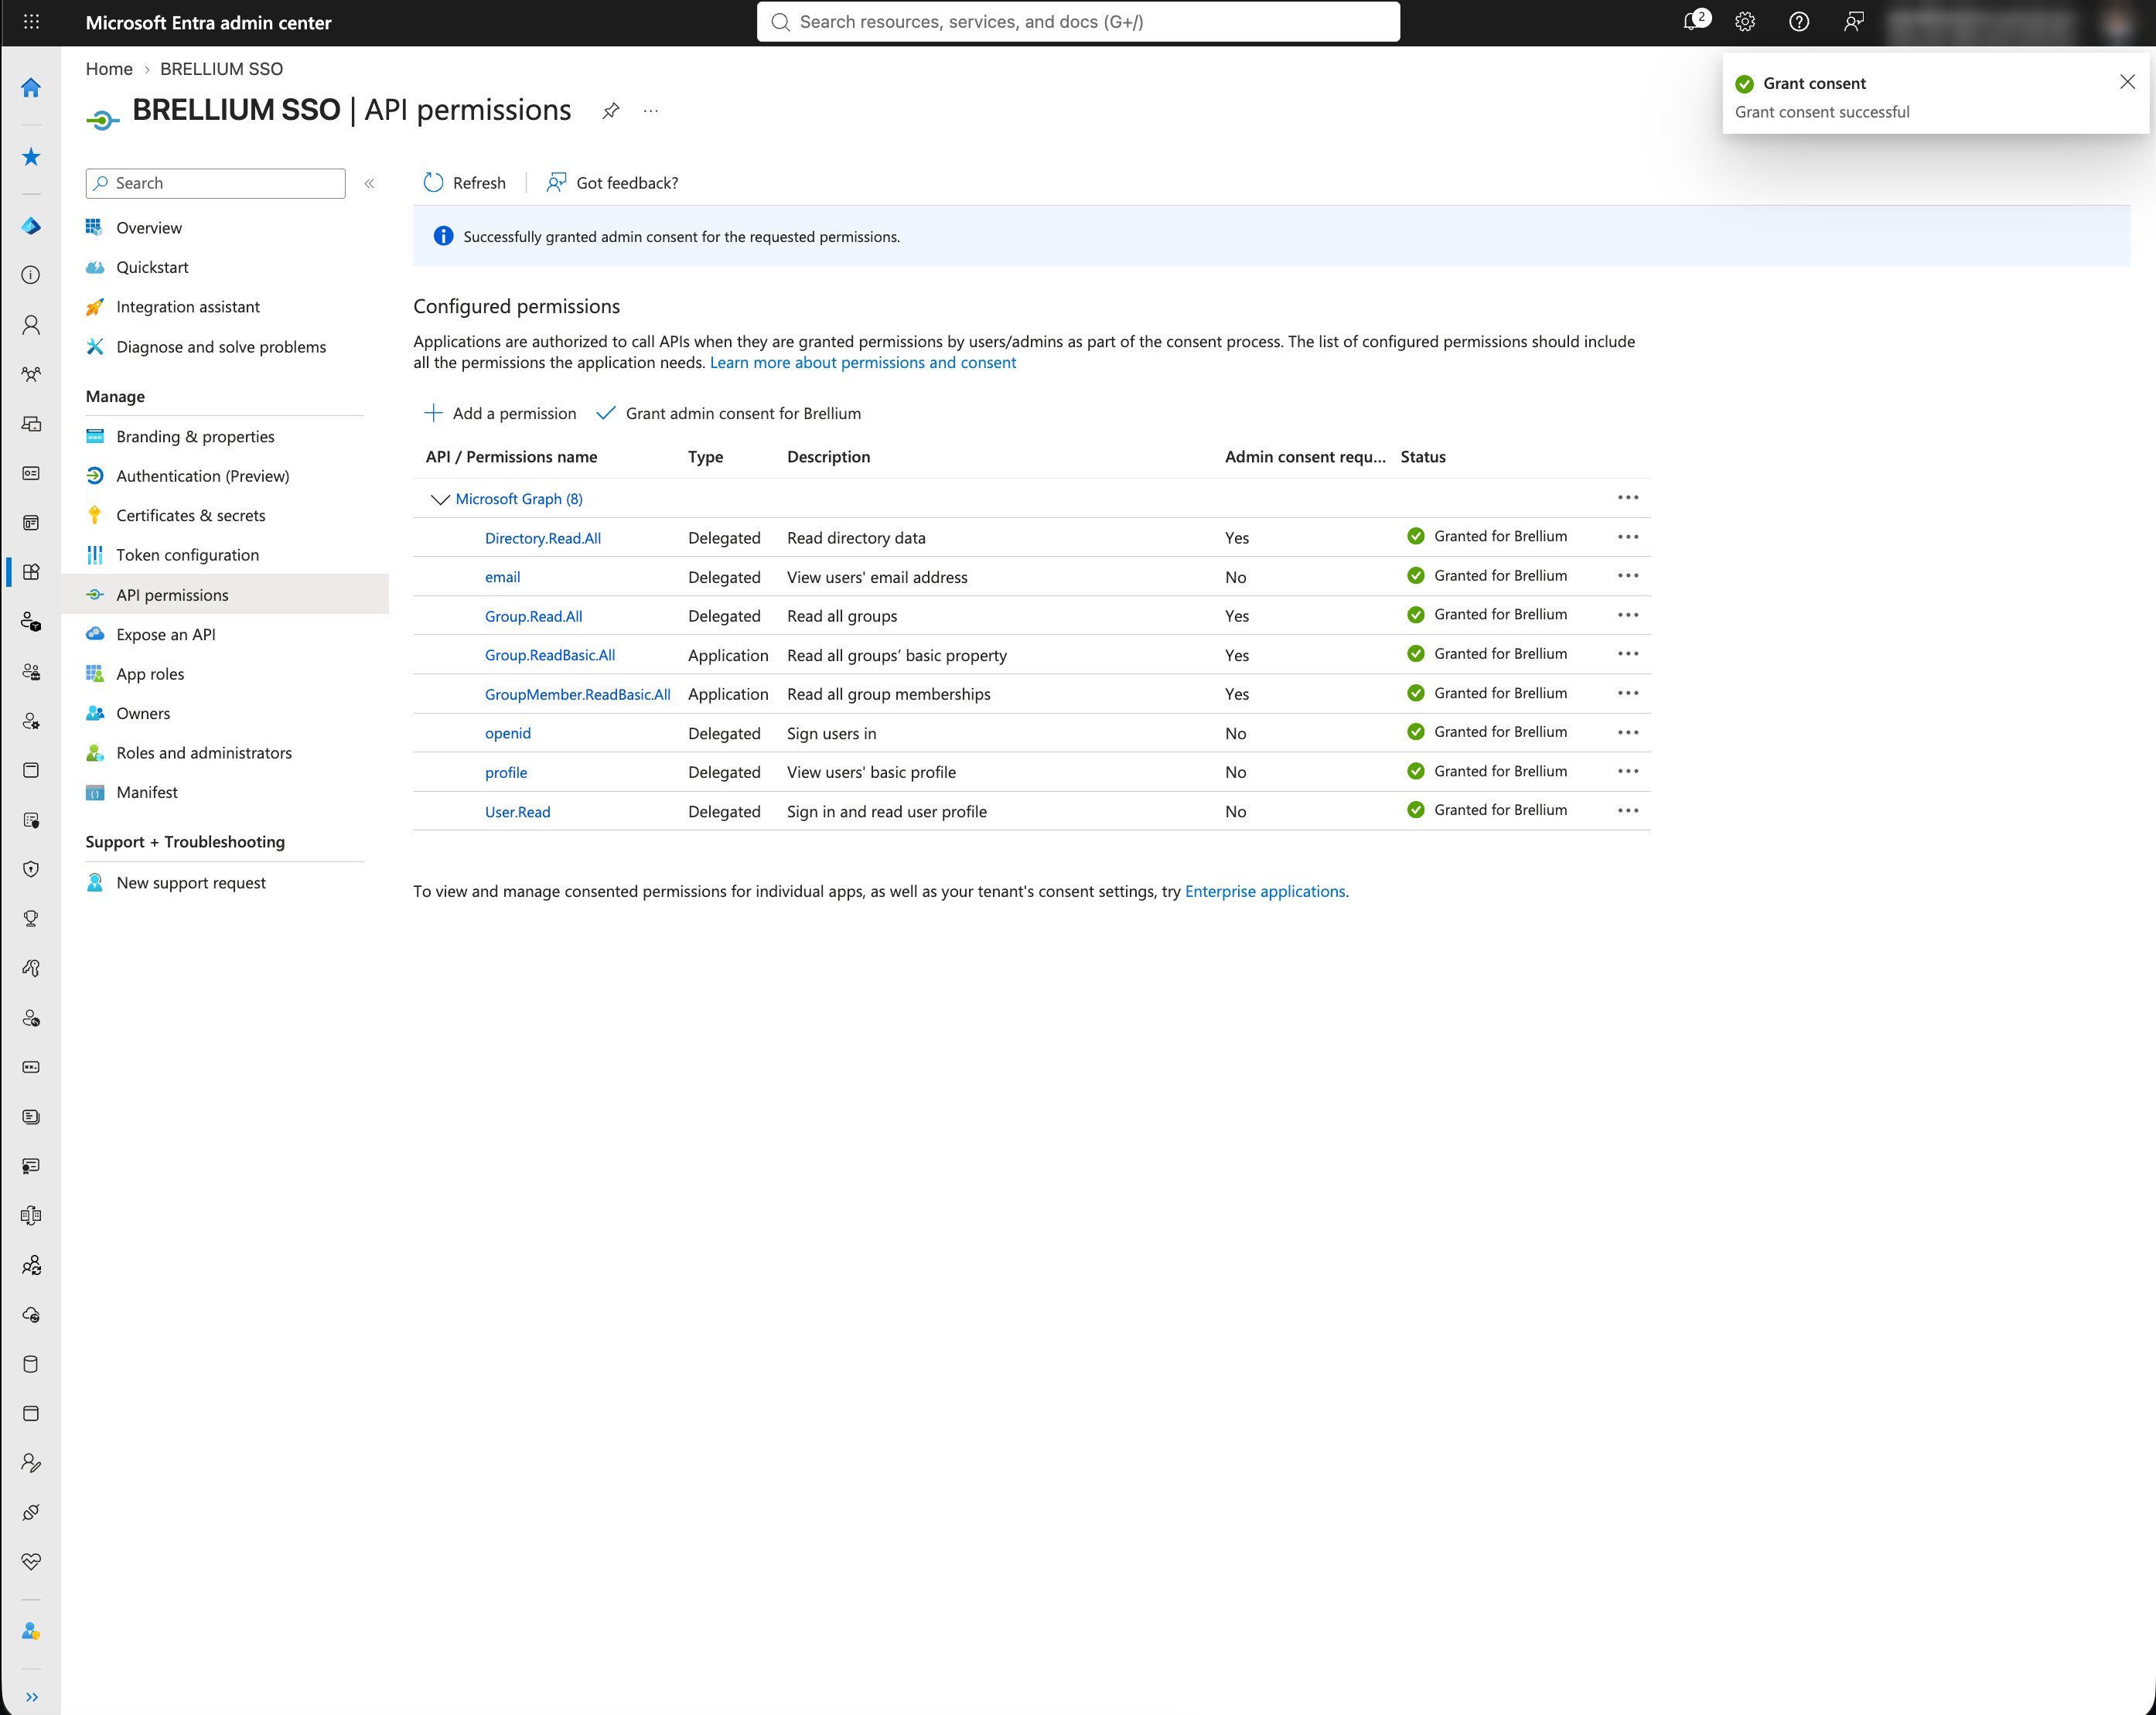
Wait for the message Grant consent successful. The banner changes to Successfully granted admin consent for the requested permissions.
Check that all permissions, including the two new Application rows, show Granted for your organization.
All permissions granted
8
Tell Brellium
Email sso.support@brellium.com or your customer success manager to say that consent is granted. Include the names of the groups Brellium should sync.Brellium uses the existing credentials of the SSO application, so you do not need to send a new secret.